
Introduction#
When developing with ESP-IDF, you may eventually need functionality that isn’t provided by its built-in components. In many cases, the solution is an open-source library from GitHub or another repository. However, these external libraries are not always structured for ESP-IDF, and simply copying their source files into your project can lead to messy integrations, difficult updates, and code that’s hard to reuse or share.
A cleaner and more maintainable approach is to wrap the external library into a reusable ESP-IDF component. Components integrate naturally with the ESP-IDF build system, can be reused across multiple projects, and make sharing and maintaining code much easier. They also help keep your project organized and scalable over time.
In this article, we’ll demonstrate this approach by porting the tinyexpr library into a fully functional ESP-IDF component, ready for reuse in future applications. To keep things simple, we’ll start by manually adding the library’s source and header files into a new component structure. In a future article, we’ll extend this setup by adding the library as a git submodule, making it easier to stay synchronized with the upstream repository as new features or bug fixes are released.
We’ll be using an ESP32-C3-DevKitM-1 board and the ESP-IDF Extension for VS Code, though the same steps apply to other boards and SoCs.
Prepare to create a component#
To keep things straightforward, we will work with a self-contained library that does not rely on specific peripherals. A good example of such a library is tinyexpr, which we will use throughout this article.
Integrating an external library as an ESP-IDF component involves several steps:
- Obtain library code
- Set up a test project in ESP-IDF
- Test the component
- Solve compatibility issues
These are the steps we will follow in the rest of the article.
Obtain library code#
The tinyexpr code is available on GitHub:
We can clone the repository to inspect the files:
git clone https://github.com/codeplea/tinyexpr.git
Although the repository contains several source files, the library itself consists of just two key files, as noted in the README:
tinyexpr.htinyexpr.c
There are also several examples in the repo, showing how to use the library. The simplest one is example.c, so it’s a good idea to use it to test our component.
Set up a test project in ESP-IDF#
To work on the porting, we need to
- Create a new project
- Create a new component
Create a new project#
To keep things simple and organized, we will start with a basic project using a template app. You can follow one of the two approaches below:
- In VS Code command palette enter:
> ESP-IDF: New Project
You will be presented with a screen like Fig.1.
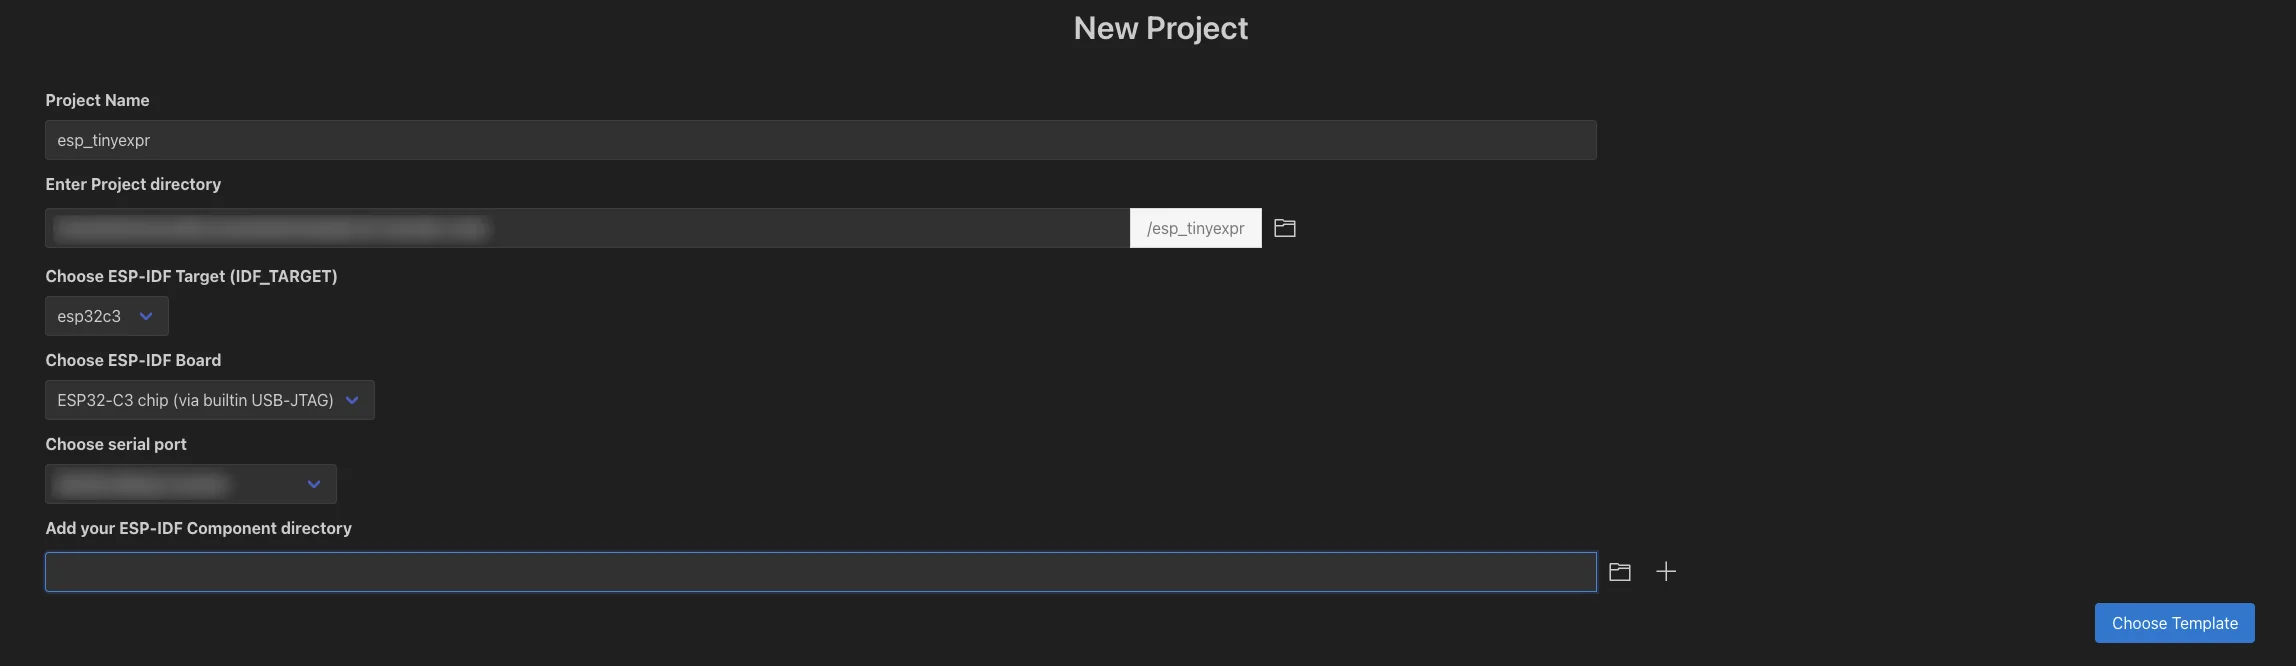
Fig.1 - Choosing the project settings
If you’re using the ESP32-C3-DevKitM, fill the fields as follows:
- Project name:
esp_tinyexpr_test - Choose ESP-IDF Target:
esp32c3 - Choose ESP-IDF Board:
ESP32-C3 chip (via builtin USB-JTAG) - Choose serial port:
(e.g. COM25or/dev/tty.usbserial-11133)
Feel free to change the settings according to your platform.
- Click on
Choose Templateand selecttemplate_app - Open the project with VS Code
You should now have the following project structure:
.
├── CMakeLists.txt
├── main
│   ├── CMakeLists.txt
│   └── main.c
└── README.md
- Download the basic example code found on this github repo.
- Open the project with VSCode
> ESP-IDF: Set Espressif Device target> ESP-IDF: Select Port to Use
Create a new component#
Next, we will create a new component named my_tinyexpr to hold the tinyexpr files.
Select
> ESP-IDF: Create New ESP-IDF Component- Name it
my_tinyexpr
- Name it
Your project structure now looks like this.
.
├── CMakeLists.txt
├── components
│   └── my_tinyexpr
│       ├── CMakeLists.txt
│       ├── include
│       │   └── my_tinyexpr.h
│       └── my_tinyexpr.c
├── main
│   ├── CMakeLists.txt
│   └── main.c
├── README.md
├── sdkconfig
└── sdkconfig.old
- Replace
my_tinyexpr.cwith the downloadedtinyexpr.c - Replace
my_tinyexpr.hwith the downloadedtinyexpr.h
Since the filenames differ from the default, update the component’s CMakeLists.txt to register the correct source file:
idf_component_register(SRCS "tinyexpr.c"
                    INCLUDE_DIRS "include")
include directory, so no additional configuration is needed to locate tinyexpr.h.Now that we’ve created the new component, it’s time to test it.
Test the component#
To test the component we need to
- Inform the build system about the new component
- Include the header file
- Call the function of the library
Inform the build system about the new component#
In the CMakeLists.txt of the __main__ component, add REQUIRES "my_tinyexpr" to let the build system know about the new component:
idf_component_register(SRCS "main.c"
                    REQUIRES "my_tinyexpr"
                    INCLUDE_DIRS ".")
This ensures that the build system includes my_tinyexpr when compiling your project.
Include the header file#
In your main file, include the header from the tinyexpr library:
#include "tinyexpr.h"
Call a function of the library#
In the tinyexpr repository, there is an example.c file that demonstrates how to use the library.
- Copy the relevant portions of
example.cinto yourmain.cfile.
Your app_main function should now look like this:
#include <stdio.h>
#include "tinyexpr.h"

void app_main(void)
{
    const char *c = "sqrt(5^2+7^2+11^2+(8-2)^2)";
    double r = te_interp(c, 0);
    printf("The expression:\n\t%s\nevaluates to:\n\t%f\n", c, r);
}
Next, build, flash, and monitor the project:
ESP-IDF: Build, Flash and Start a Monitor on Your Device
And we got and error!
In file included from <PATH>/tutorial-porting-tinyexpr/components/my_tinyexpr/tinyexpr.c:43:
<PATH>/tutorial-porting-tinyexpr/components/my_tinyexpr/tinyexpr.c: In function 'next_token':
<PATH>/tutorial-porting-tinyexpr/components/my_tinyexpr/tinyexpr.c:255:32: error: array subscript has type 'char' [-Werror=char-subscripts]
  255 |             if (isalpha(s->next[0])) {
      |                         ~~~~~~~^~~
<PATH>/tutorial-porting-tinyexpr/components/my_tinyexpr/tinyexpr.c:258:39: error: array subscript has type 'char' [-Werror=char-subscripts]
  258 |                 while (isalpha(s->next[0]) || isdigit(s->next[0]) || (s->next[0] == '_')) s->next++;
      |                                ~~~~~~~^~~
<PATH>/tutorial-porting-tinyexpr/components/my_tinyexpr/tinyexpr.c:258:62: error: array subscript has type 'char' [-Werror=char-subscripts]
  258 |                 while (isalpha(s->next[0]) || isdigit(s->next[0]) || (s->next[0] == '_')) s->next++;
      |                                                       ~~~~~~~^~~
cc1: some warnings being treated as errors
ninja: build stopped: subcommand failed.
There is a compatibility issue. Although the library you found is written in C and appears to work, compiler settings or library dependencies could still cause problems. Let’s investigate what is preventing the compilation.
Solve compatibility issues#
The error is in the following code.
if (isalpha(s->next[0])) { ... }
while (isalpha(s->next[0]) || isdigit(s->next[0]) || (s->next[0] == '_')) s->next++;
It happens because a char is directly passed to isalpha() and isdigit(). On many platforms, char is signed, and these functions expect an int in the range of unsigned char (or EOF). Passing a signed char can trigger warnings or undefined behavior.
ESP-IDF uses very strict compilation flags and treats all warnings as errors (-Werror), which is why these warnings stop the build.
So we have two options, changing the code or changing the compilation flag.
Changing the code#
A fast way to fix it is to cast the character to unsigned char:
if (isalpha((unsigned char)s->next[0])) { ... }

while (isalpha((unsigned char)s->next[0]) ||
       isdigit((unsigned char)s->next[0]) ||
       (s->next[0] == '_')) s->next++;
Now we can build, flash, and monitor the project again.
ESP-IDF: Build, Flash and Start a Monitor on Your Device
And we get the expected output.
The expression:
        sqrt(5^2+7^2+11^2+(8-2)^2)
evaluates to:
        15.198684
Changing the compilation flag#
Alternatively, the issue can be resolved by adjusting the compilation flags instead of modifying the source code. Since the error originates from -Werror=char-subscripts, we can suppress it by adding the following line to the CMakeLists.txt file of your component:
target_compile_options(${COMPONENT_LIB} PRIVATE -Wno-char-subscripts)
This approach is often preferable when working with external libraries, as it allows you to keep the original source code intact. It also makes it easier to manage updates: if the library is included as a git submodule, any future improvements or security fixes can be applied by simply updating the submodule, without the need to reapply code changes.
Now that we’ve covered the basics of creating a component and resolving common compatibility issues, the next article will build on this foundation. You’ll see how to import a component as a git submodule, integrate it into multiple projects, and share it with the community. This workflow not only helps keep your code organized and maintainable but also ensures that updates and improvements can be easily propagated across projects without modifying the original source.
Conclusion#
In this article, we demonstrated how to take an existing open source library and integrate it into an ESP-IDF project as a reusable component. We located the tinyexpr library, created a new ESP-IDF project, built a dedicated component for the library, resolved compatibility details, and verified its functionality on an ESP32-C3-DevkitM-1 board. By packaging the library as a component rather than copying source files directly, we ensured cleaner integration, easier maintenance, and effortless reuse in future projects.