
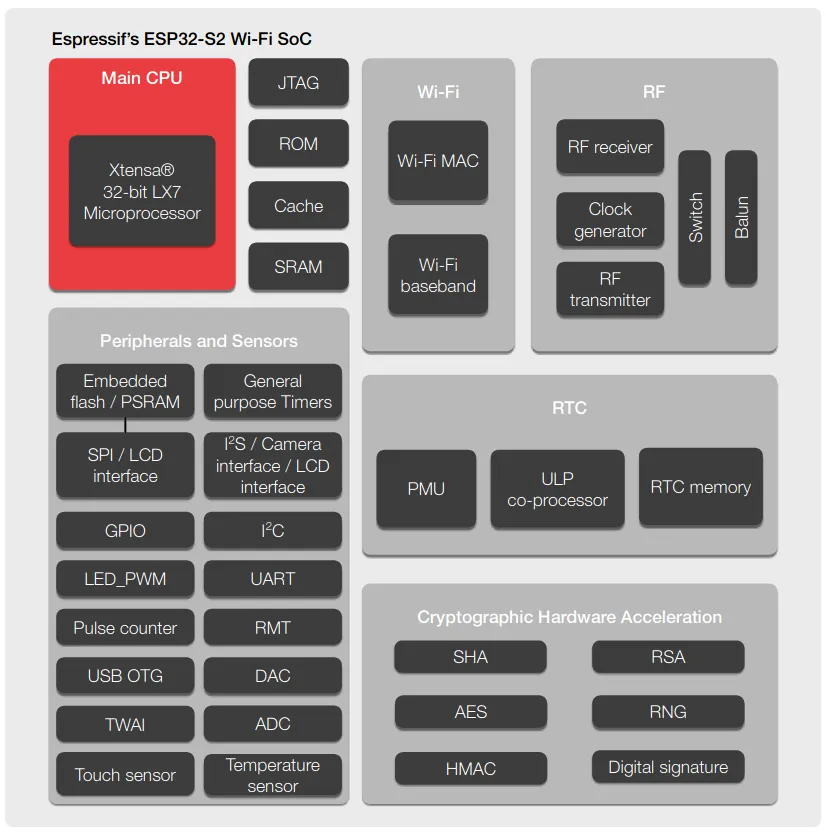
Since the ESP32-S2 was released, a notable new functionality got everyone’s attention: the USB host and device capabilities. This new functionality adds a new world in terms of possibilities and cool stuff that could be made using USB and it’s a game changer in many projects.
But one of the uses for this peripheral is to upload the firmware without any external IC or programmer. This can be done directly by using the USB DFU mechanism.
The DFU (Device Firmware Upgrade) makes it possible and easy to update the device firmware as well as monitor the device.
Usually, to flash a new firmware to the ESP32 flash memory, you have two possibilities:
Now, the DFU works very similarly to the UART method, but it has some differences when building the firmware that will be uploaded using DFU.
To work with DFU, you don’t need to install any new software, just the ESP-IDF toolchain.
If you want to go deeply in the DFU mechanism, see this official specification from USB.org.
Using DFU for the first time#
To start using the DFU, we first need to check if your IDF version supports the functionality.
The ESP32-S2 support starts from the IDF v4.2. To check your IDF version, you can use the following command on the terminal/shell/command prompt:
*idf.py --version*
To install the ESP-IDF, you can follow the Getting Started guide from our official documentation.
If you’re not using this version or above, please consider updating your environment in order to get this feature working on the ESP32-S2.
Electrical connection#
For this example, we will use the ESP32-Saola-1 v1.2 development board.
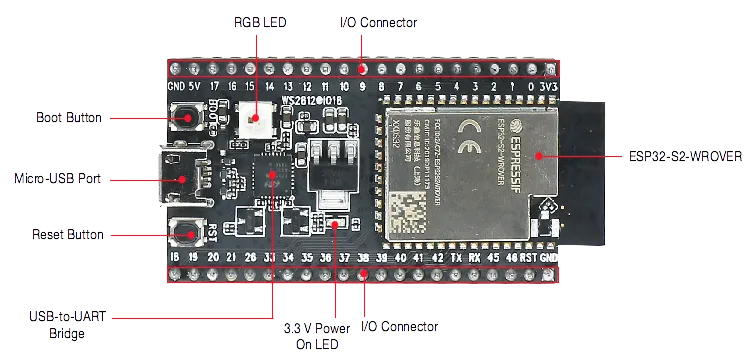
As you can see, the Saola board doesn’t have the connector for the native USB, only for the external USB-to-UART. To use the native interface, you need to connect a breakout USB cable as follows:
- USB D- to GPIO19
- USB D+ to GPIO20
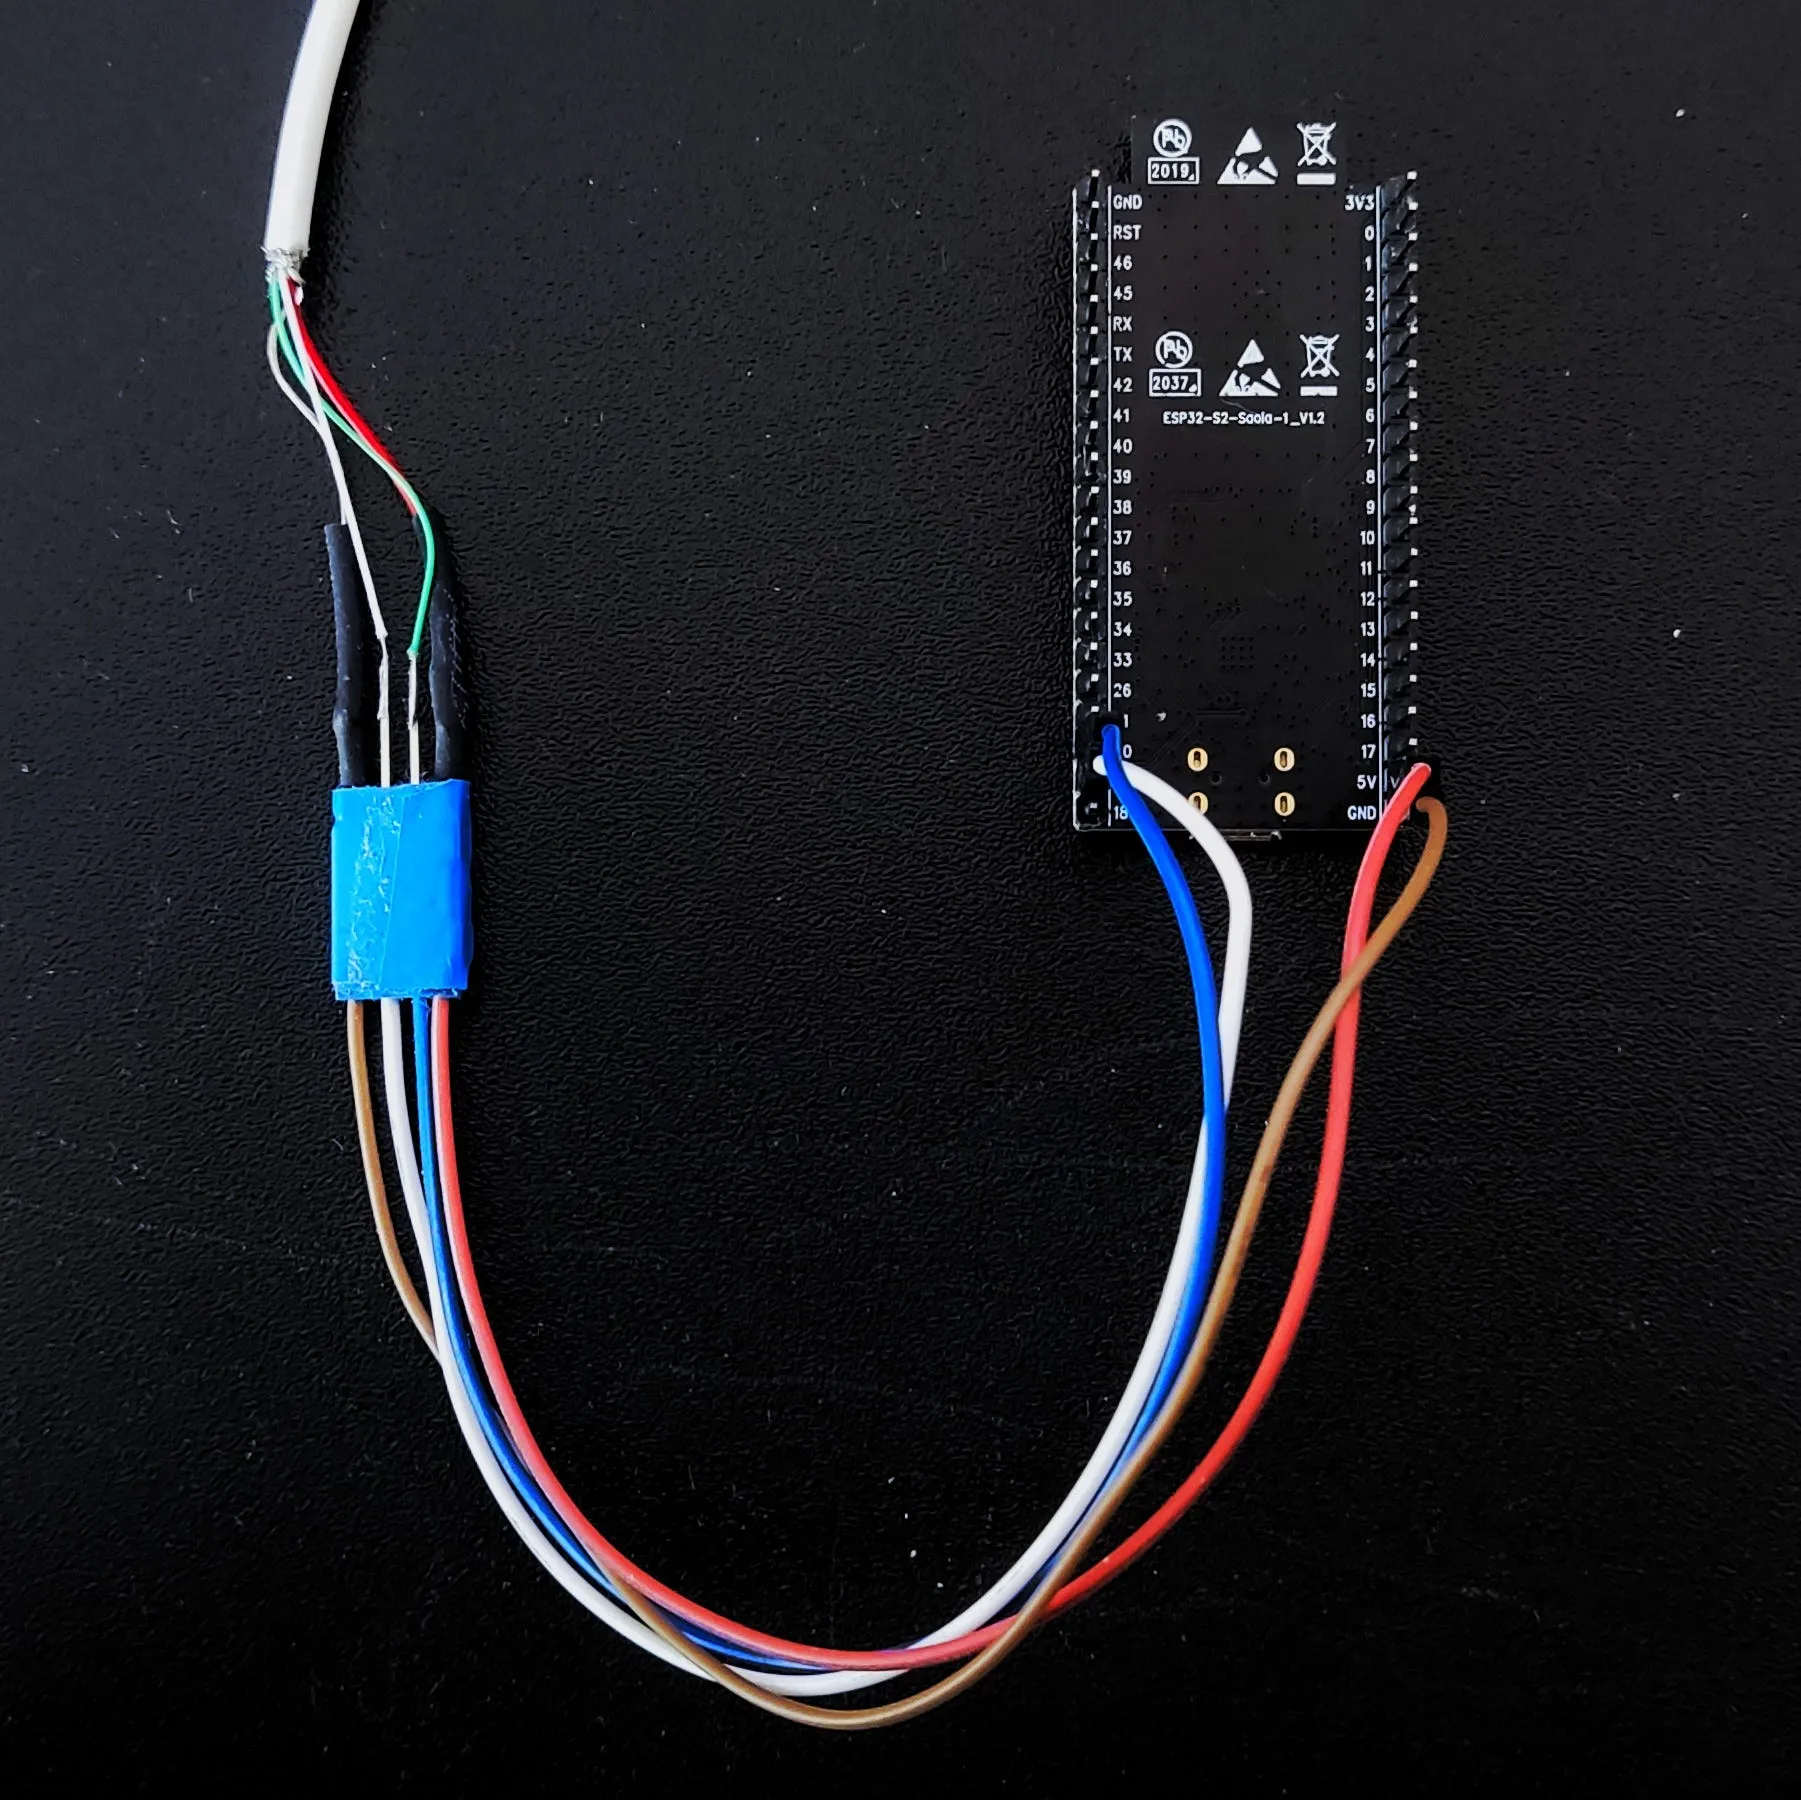
You can use an old USB to do this by striping the wires and soldering to the pin header or using a breadboard to make it easier. In most of the cables, the D+ is the green and the D- is the white wire.
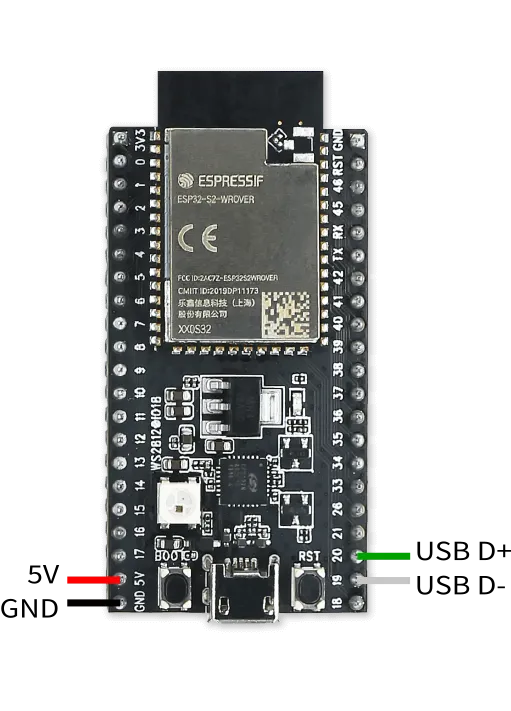
Be careful if you are going to use the USB 5V to power the board. Make sure that you’re connecting the 5V on the pin marked as 5V in the ESP32-Saola dev kit.
After connecting and powering the board, we are able to enter in DFU mode by holding BOOT and pressing and releasing the RST (reset) button.
Building the DFU firmware#
To build the firmware and upload it over the DFU, the process is a little bit different from a regular firmware, but it is very easy to do it.
To build and flash a regular firmware, we use the following command:
idf.py build flash
Note: We can use only “flash” instead of “build flash”, since the toolchain will build the firmware before flashing anyway.
To build the firmware for DFU, we need to change to:
idf.py dfu dfu-flash
Before executing the command, be sure to be in DFU mode.
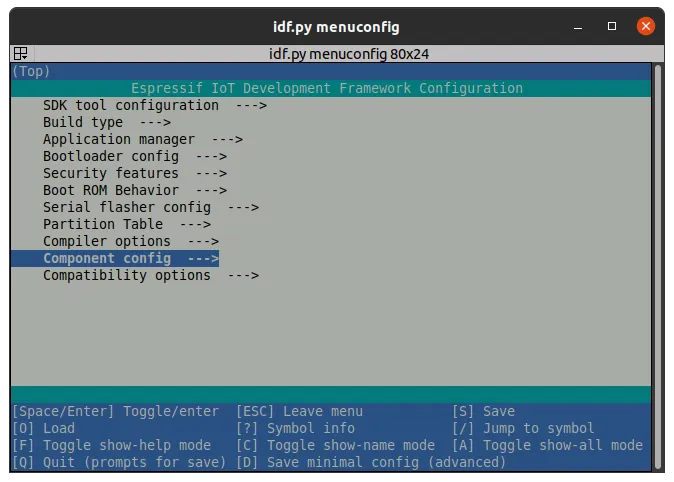
If you need to monitor the log output in the terminal, you must change the log output configuration before building. This configuration changes the log output from UART to USB CDC, in order to see all the console prints over the USB.
You can do this by following these steps:
Go to Component config menu.
Select ESP System Settings or Common ESP-related (if ESP-IDF is the v4.2).
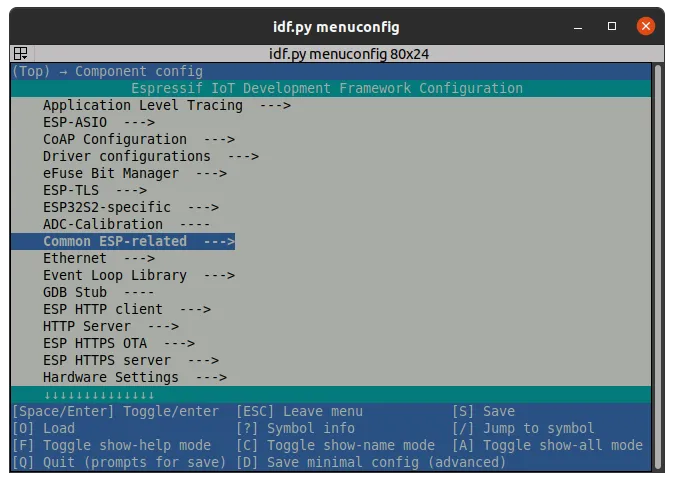
Change the Channel for console output to USB CDC.

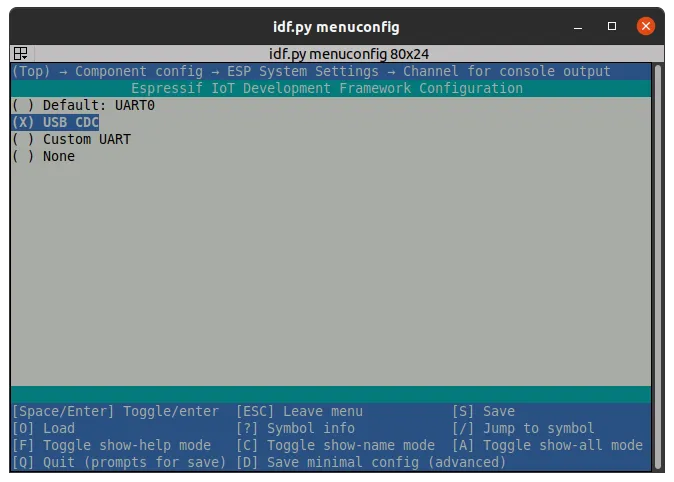
Save and exit the configuration menu build and flash the firmware.

Example Video#
This is the example video on how to configure and use the DFU on the ESP32-S2 to flash and monitor the ESP32-Saola development kit.
Conclusion#
Taking advantage from the embedded USB peripheral on the ESP32-S2 could save time and money by reducing build of material and space in your project. Embedding the program interface into your project could save time and it’s much more convenient than using an external one with some wires.
Also, you can use USB peripheral for many other solutions, not only for programming your board!