
Since its launch in April 2020, we have been making quite some improvements to ESP RainMaker, mostly around the feature set. Along with that, we have also been making efforts to make developer on-boarding easier. The ESP IDF Windows Installer and the Eclipse and VSCode integrations especially have been useful for a lot of developers. One common request we still kept getting was support for Arduino, since getting started with it is much more convenient for many developers and it is also easier to migrate from other chips/platforms since the IDE and code structure is familiar.
So, here it is. The support for ESP RainMaker in Arduino is now live.
Overview#
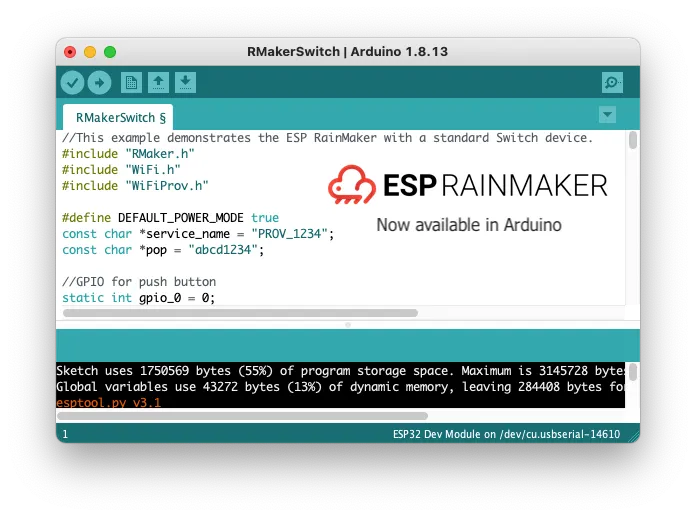
A sample sketch for a switch has been included. Let’s quickly look at the code that enables this.
//GPIO for switch relay
static int gpio_switch = 16;

// The framework provides some standard device types like switch, lightbulb,
// fan, temperature-sensor. You may add your own as well.
static Switch my_switch("Switch", &gpio_switch);

void setup()
{
    // Create a RainMaker Node
    Node my_node = RMaker.initNode("ESP RainMaker Node");

    //Add the switch device to the node
    my_node.addDevice(my_switch);

    // Add processing callback to the switch (This is what will get called when
    // the state of the switch is updated using the phone-app or voice-assistants
    my_switch.addCb(write_callback);

    // Enable RainMaker features to be supported (we enable Schedules and OTA here)
    RMaker.enableOTA(OTA_USING_PARAMS);
    RMaker.enableTZService();
    RMaker.enableSchedule();
    RMaker.start();

    // Hand-over the control for Wi-Fi Provisioning. If a Wi-Fi network is not yet configured,
    // this will start the provisioning process, else it will connect to the Wi-Fi network
    WiFiProv.beginProvision(WIFI_PROV_SCHEME_BLE, WIFI_PROV_SCHEME_HANDLER_FREE_BTDM,
                                              WIFI_PROV_SECURITY_1, pop, service_name);
}
With the above few lines of simple code, our fully functional smart switch is ready. The switch can be controlled with the Android and iOS applications, as well as Alexa and Google Voice Assistant skills.
When we execute this code:
- The device will first check if a Wi-Fi network is configured. If the network is not configured, it will launch the provisioning process. The device can then be configured using the phone apps mentioned above.
- If Wi-Fi configuration is found, it will connect to the configured network.
- Once connected, it will connect to the RainMaker cloud, looking for commands to modify its parameter (switch state in this case).
- The device will also look for commands on the local Wi-Fi network.
- When somebody changes the switch state using phone apps or voice integrations, the write_callback() gets called. This is then implemented as:
void write_callback(Device *device, Param *param, const param_val_t val, void *priv_data, write_ctx_t *ctx)
{
    const char *param_name = param->getParamName();

    if(strcmp(param_name, "Power") == 0) {
        switch_state = val.val.b;
        (switch_state == false) ? digitalWrite(gpio_switch, LOW) : digitalWrite(gpio_switch, HIGH);
        param->updateAndReport(val);
    }
}
The function takes the new switch output value and
- updates in our internal state,
- calls the driver to update its GPIO state
- reports back to the cloud the new state
There, that’s a fully functional Smart Switch in action. A few common device types are already supported in the data model (bulb, fan, switch), but you can add yours too.
Getting Started#
Before you even get started, a few points to note
- For using RainMaker, you first have to get started with the ESP32 support in Arduino.
- RainMaker support is not yet part of a stable esp32-arduino release. So we will use the master branch of the ESP32 Arduino repository. We will update here and elsewhere once this support is available in a stable release.
- Currently, only ESP32 is supported. Support for ESP32-S and ESP32-C series is coming soon.
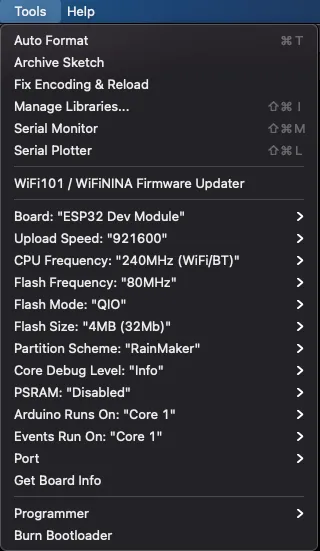
Once your Arduino is set-up with the ESP32 support, follow these steps
- Board: “ESP32 Dev Module”
- Flash Size: “4MB”
- Partition Scheme: “RainMaker”
- Core Debug Level: “Info”
- Port: Choose the appropriate ESP32 port as per your Host platform from the list. By connecting/disconnecting your ESP32 board, you can find out the port number.
This is the complete list for reference:
Now, go to File -> Examples -> Examples for ESP32 Dev Module -> ESP RainMaker -> RMakerSwitch
Upload the Sketch onto your ESP32 board by clicking on the Upload button in the IDE, or going to Sketch -> Upload
Go to Tools -> Serial Monitor. Choose 115200 as Baud. If you do not see anything in the monitor window, reset your board (using the RST button).
Download the ESP RainMaker phone app, sign-up or sign-in and you are ready to go.
Follow the instructions in the Serial Monitor to add the switch from the RainMaker app. (If you do not see the instructions, double check the “Core Debug Level: Info” option under Tools)
Any control from the phone app should now reflect on the device and any change on the device (by pressing the BOOT button) should reflect in the phone app.
You can press and hold the BOOT button for more than 3 seconds and then release for Resetting Wi-Fi, and for more than 10 seconds to Reset to Factory defaults.
Please check out here to understand more about ESP RainMaker. Even though all the RainMaker APIs are expected to work seamlessly with Arduino, we have provided some simplified APIs to suit typical Arduino codes, as you can see here.
John Macrae is active in our ESP32 maker community and he had created this video when Arduino support was launched. His newer video demonstrates the improvements introduced recently and also shows how to build a custom device.
Hope you enjoy RainMaker, have fun hacking!
