
Recently, I’ve been sitting behind my computer, which is unluckily situated against a window. Sharp late-afternoon sunlight made me think about some intelligent system that recognizes this light and closes the curtains. As home automation has become more and more widespread in recent years, there are many options available on the market that solve most of the common problems we have daily. However, talking about intelligent curtains systems, most of the available solutions require replacing the whole curtains’ holders like rods or rails. I wanted to develop a system adaptable to curtains that are already in use.
After several sketches, modeling attempts, and soldering experiments, this is what I came up with:
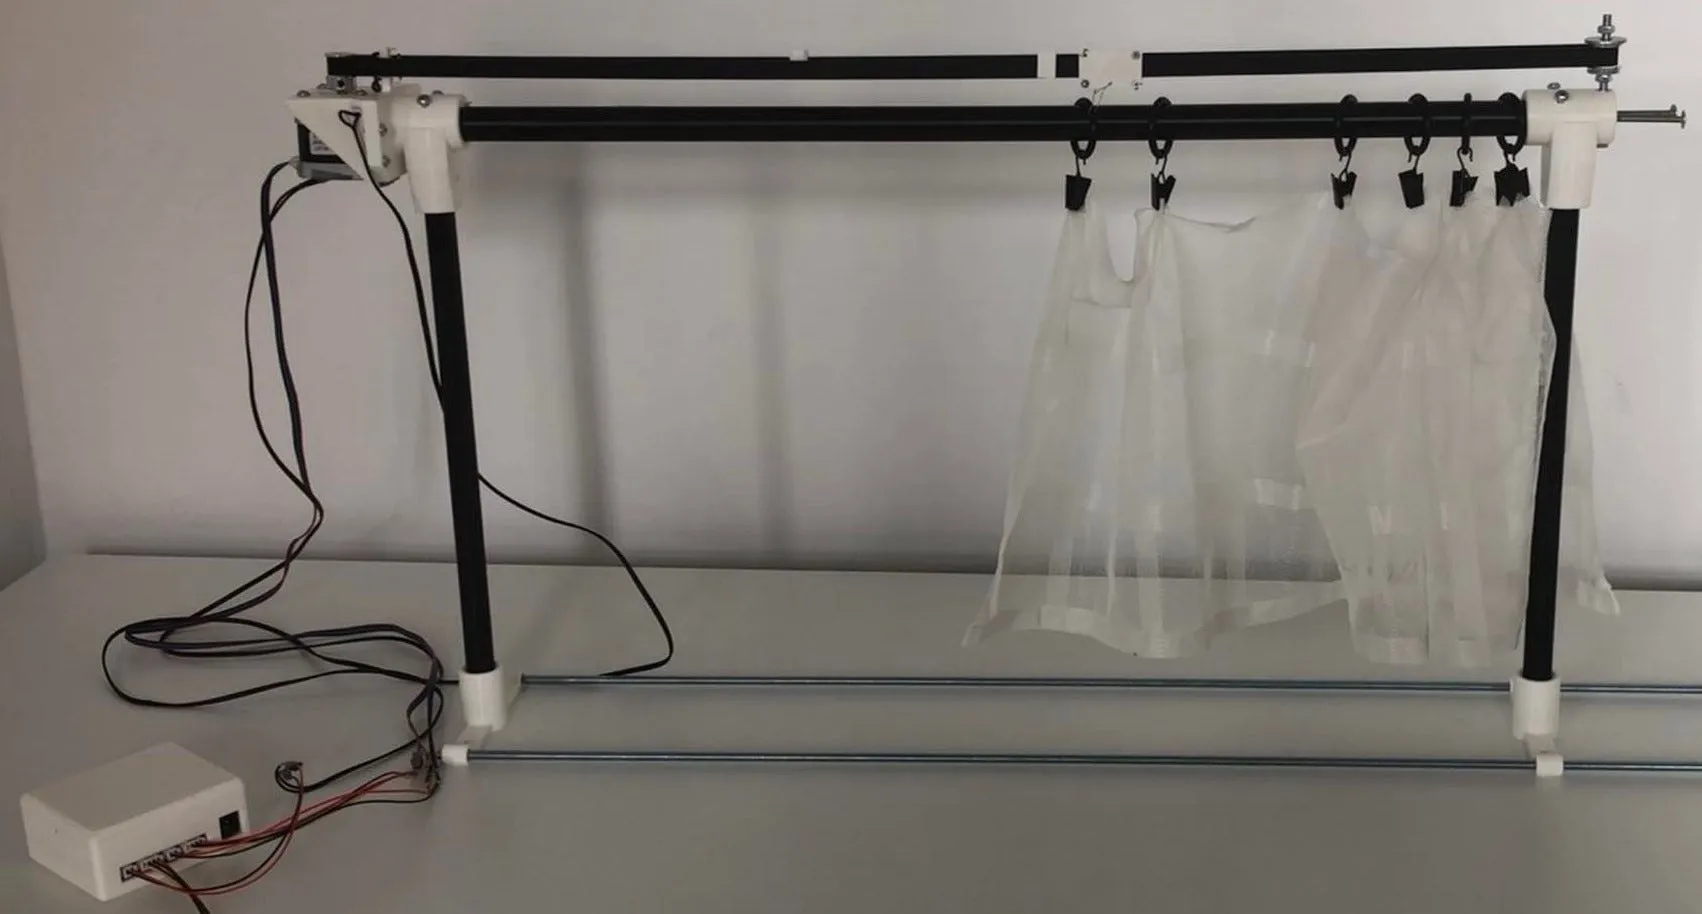
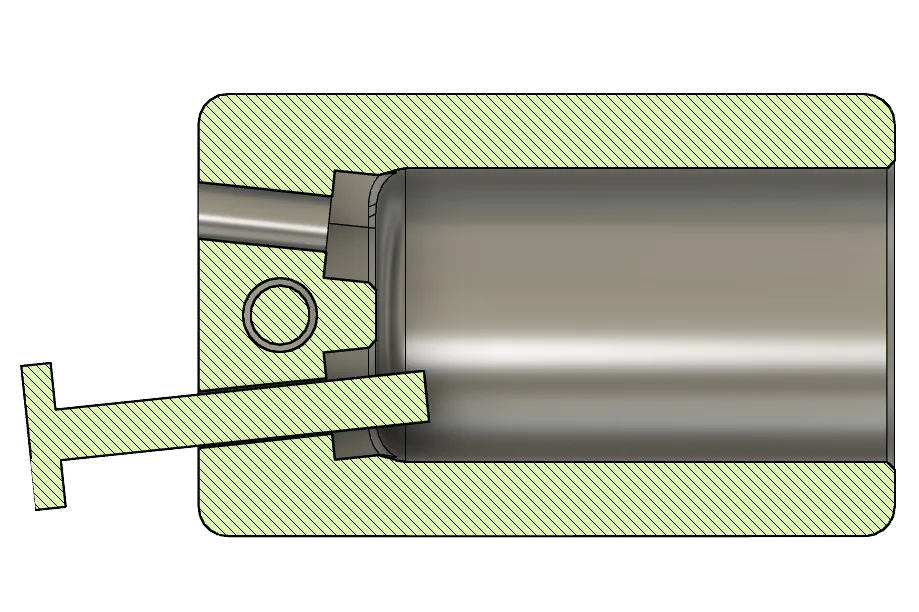
Assembly#
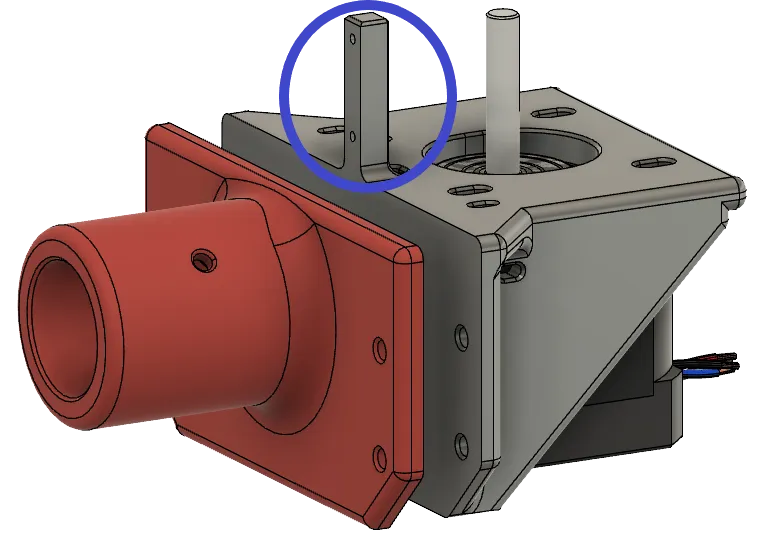
- Stepper motor NEMA17 with driver TMC2209 to move the curtains
- BH1750 light sensor that provides information about light intensity
- thermistor to control the temperature of the motor to prevent overheating
- reed switch whose function is to initialize the curtains
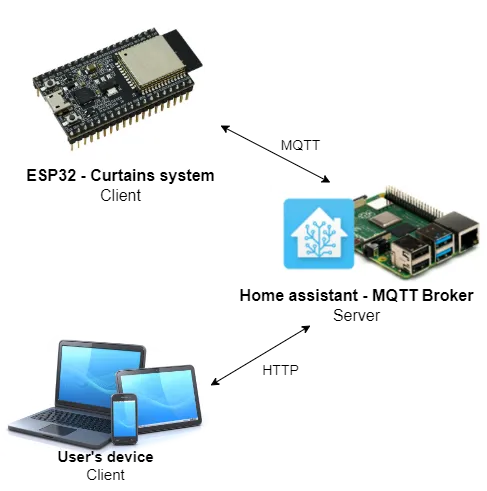
- ESP32-DevKitC board controls the stepper motor and communicates with the server/Home Assistant
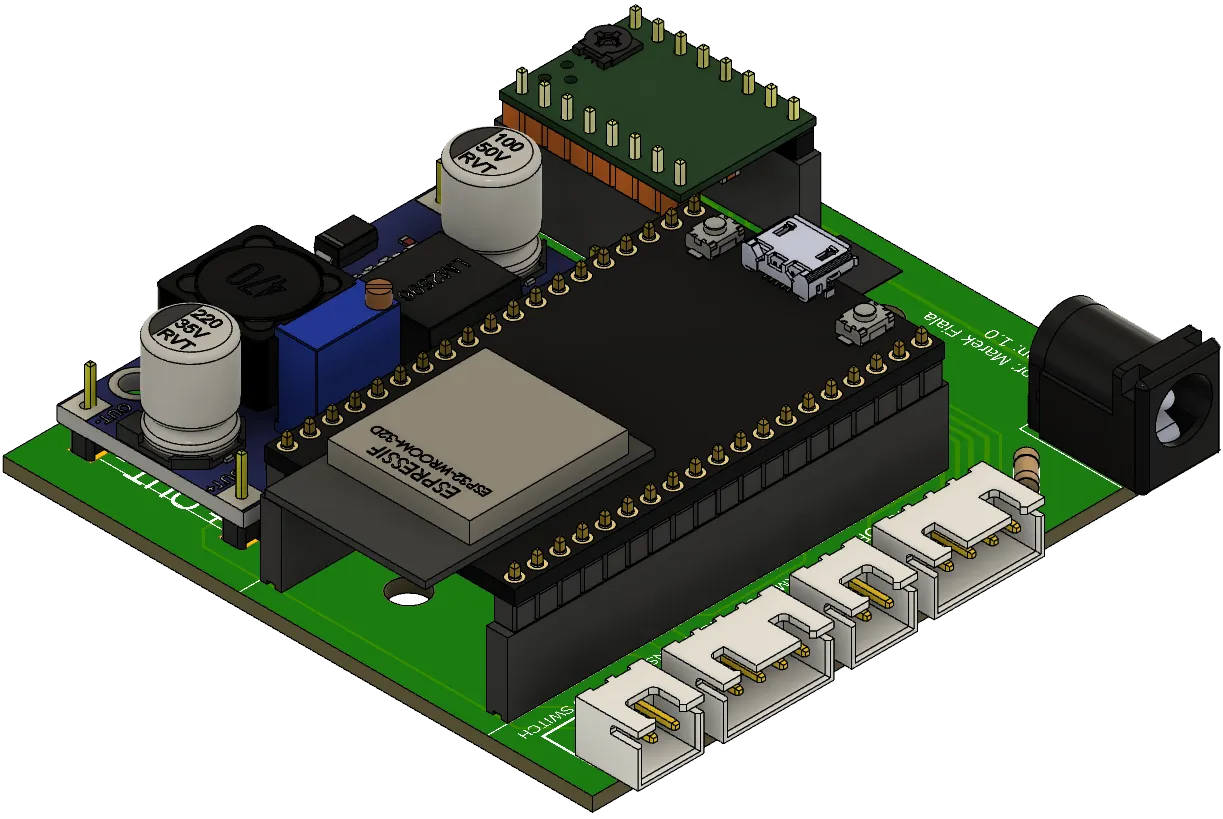
- DC/DC buck converter converts 12V powering the Stepper motor into 5V, which powers the ESP32-DevKitC
All parts used in this project should be easy to buy in any hardware/electronics store. The only exception may be the TMC2209 driver. It was developed to control 3D printers, thus it will definitely be in a 3D printing store. For an easier understanding of how these components work, I have linked datasheets to them.
Solution#
A key feature to call this system automated is the reed switch. After plugging the system into electricity, it automatically starts moving the curtains. Neodymium magnets are placed on the belt, which are detected with the reed switch when the system is fully opened or closed. That’s how the system is initialized and ready to move to certain positions.
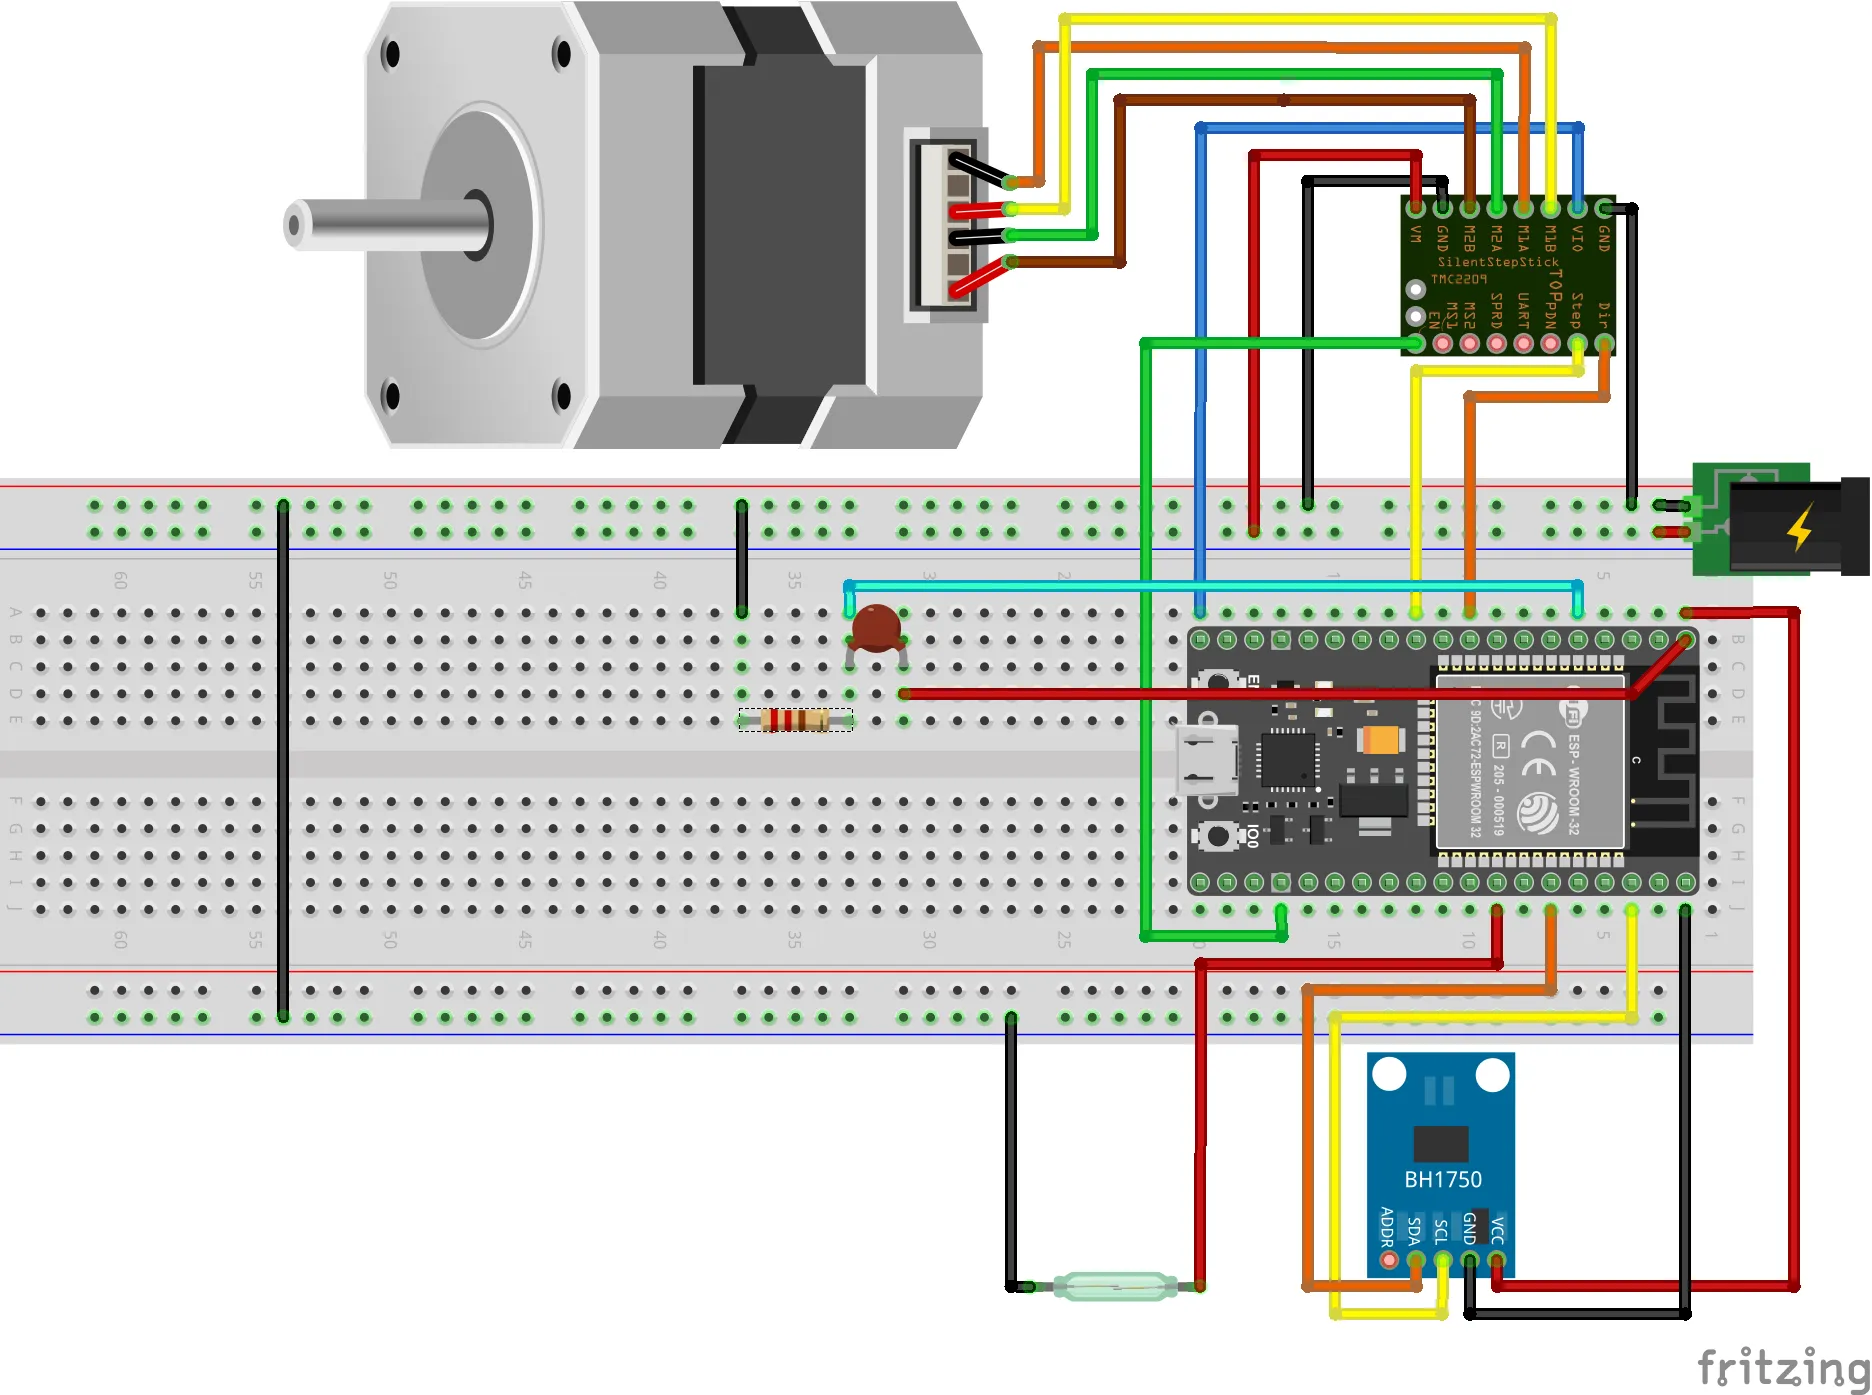
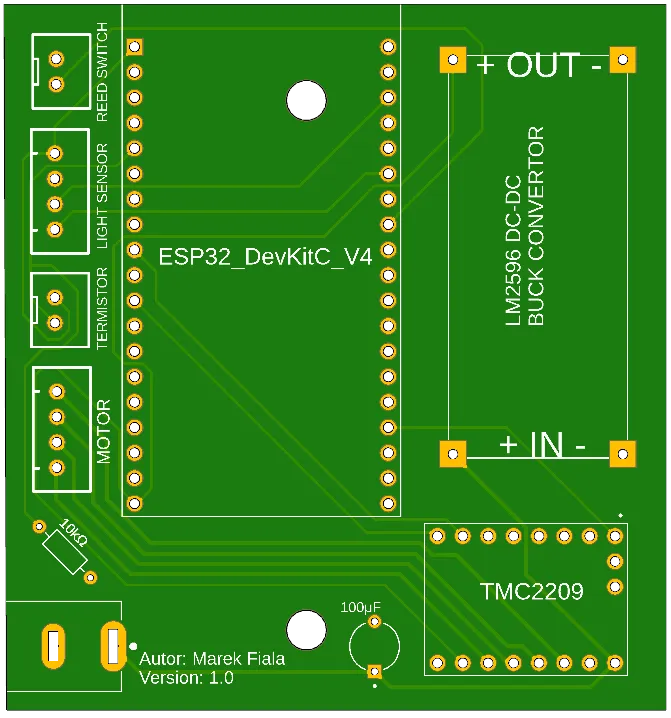
I’ve created a custom PCB board to connect all these parts. The schematics diagram can be found in the GitHub repo. For better manipulation and modularity, all the peripherals are connected with JST XH connectors and pin sockets soldered to PCB.
Software#
I decided to implement three control modes. When one of these modes is active, the functionality is as follows:
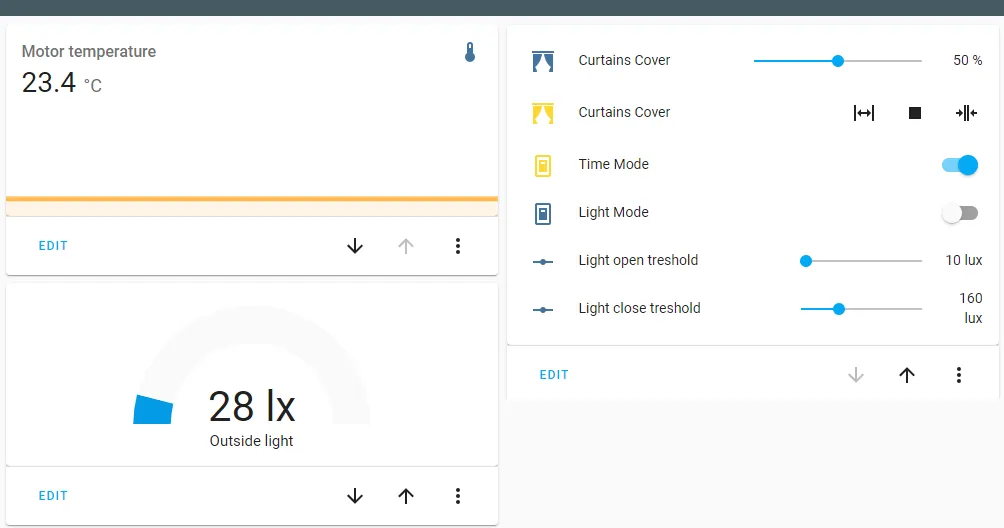
Communication between the user and the system is ensured by Home Assistant. Home Assistant runs as a server on a local network to which the ESP32 connects and communicates using the MQTT protocol (MQTT Broker extension in Home Assistant).
Every transferred value has its MQTT topic, like: *light, temperature, position, etc. *Most of the messages are just Integers, which are easy to send. But timeTable sends more than just a number, so the message must be serialized. In my case, into JSON format.
void Week::processRequrst(DynamicJsonDocument doc)
{
    const char *action = doc["action"];
    const char *day = doc["day"];
    int hours = doc["hour"];
    int mins = doc["min"];
    int position = doc["position"];
...
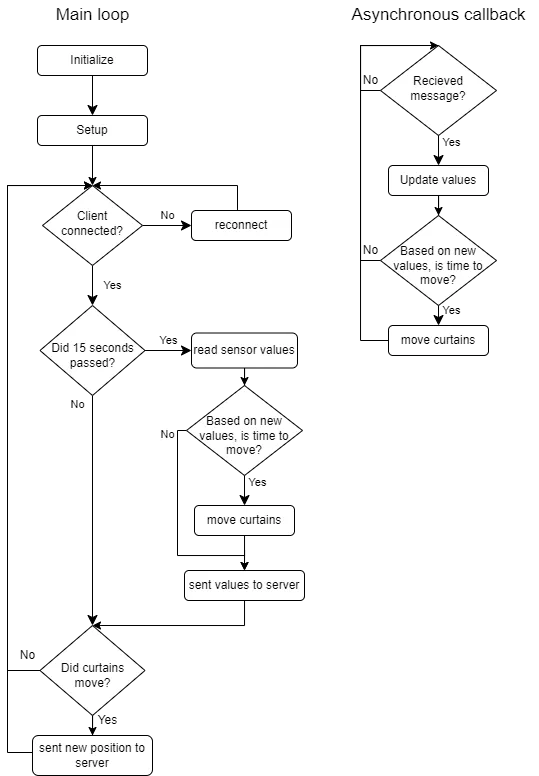
Home Assistant provides friendly GUI, where the user can change and set values of desired modes. When the whole system is fully initialized, there is an asynchronous function callback, that process an incoming message and based on the topic changes the relevant values. The program cycles in an infinite loop and processes the position of the curtains based on the active mode, sensor values and actual position. It also reads new sensor data every 15 seconds, which is sent to the server.
Mechanics#
For easy adaptation to existing curtains, I designed 3D models of required holders that can be attached to the curtain rod. 3D models were made in Fusion 360 and can also be found in the repository.
Testing#
After assembling all parts into a prototype, came the moment of truth: How is it going to work altogether? After some debugging, the moving with all required modes works just fine. One of the problems is that I could not reach the required speed, probably caused by the stepper motor library I used.A future improvement could be motor overload detection. This function is called StallGuard and is supported by the TMC2209 driver. It can be used to detect a foreign object in the way of curtains to prevent the stepper motor from overloading.
Conclusion#
This project was created as a Bachelor’s degree project at the Faculty of Information Technology, Brno University of Technology. I decided to implement the project in Arduino IDE, because of multiple choices of existing libraries to control time, motor, or WiFi connection. This was my first project using an embedded device and all its belongings like creating PCB, 3D modeling, soldering, etc…
Reference#
Link to GitHub repo with all used libraries and models can be found here: Smart curtains system