Windows prerequisites 🪟
·1 min
This guide outlines the preliminary steps to set up your work environment and follow the workshops.

In this guide, we’ll walk set up the development environment to work on projects based on the ESP-IDF toolchain.
We’ll use the open-source IDE VS Code and the ESP-IDF extension for VS Code, which allows you to configure the toolchain, build projects, and flash the memory of Espressif modules.
If you don’t have an Espressif development kit available, you can still complete all the steps in this guide except for the last one.
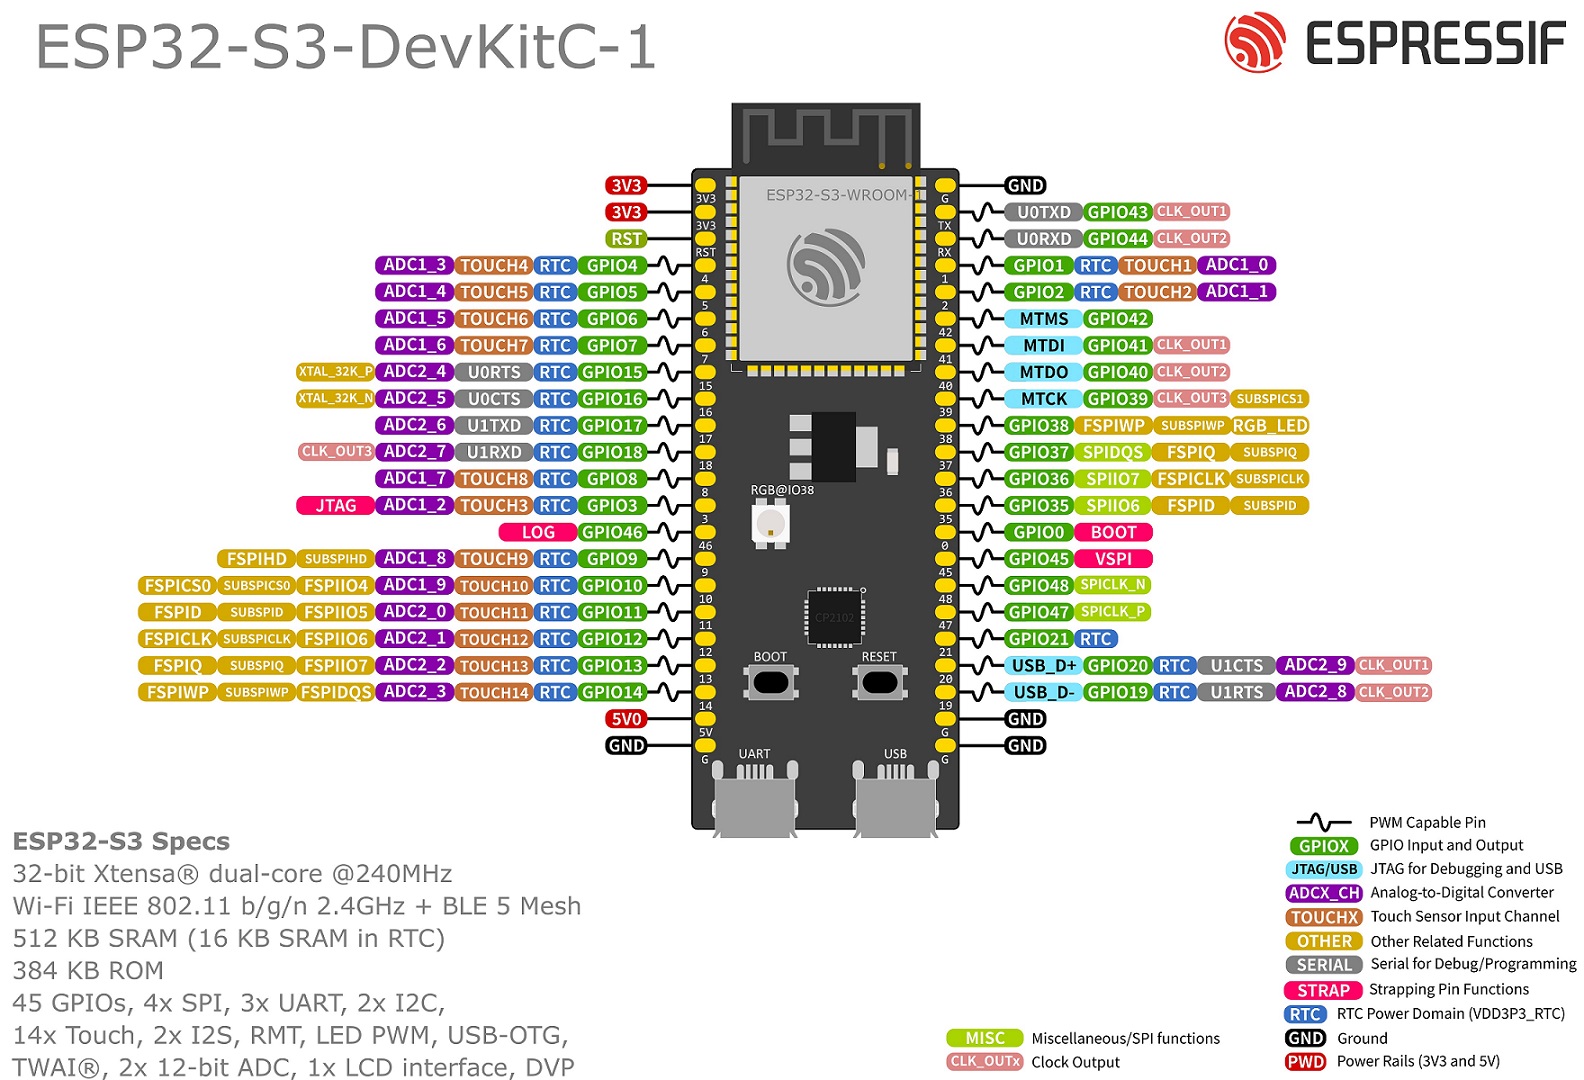
For the final step, you’ll need a physical board with an Espressif SoC, for example, the ESP32-S3-DevKitC-1.
The guide is divided into 5 parts:
This step depends on your operating system. Follow the appropriate guide below:
Once all prerequisites are installed, we can add the ESP-IDF extension to VS Code. Using the ESP-IDF extension, we’ll then install and configure the ESP-IDF toolchain.
Open VS Code
Click the Extensions icon (four squares) on the left
In the search bar, type esp-idf
Click “Install” on the first result, ESP-IDF
Once the ESP-IDF extension is installed, we need to install the toolchain. This is done through the Installation Manager.
Open the Command Palette by pressing F1 and type
> ESP-IDF: Open ESP-IDF Installation Manager
Click on the drop down menu item
When asked about the mirror, choose Github
After a few seconds, the installation manager GUI will appear.
Click on Easy Installation
You’ll be presented with a welcome screen. Click on Start Installation
Choose the latest stable release (v5.5.3 as of today)
Wait for the installation to finish. This will take some time. You can monitor the progress using the progress bar.
Once finished, click on Go to Dashboard to verify the installation
You should see v5.5.3 among the installed versions
You can now close the Espressif Installation Manager GUI
Now that the extension and toolchain are installed, it’s time to test building a project. We’ll create a new project based on one of the examples included with the ESP-IDF toolchain.
Open the Command Palette (F1 or CTRL+SHIFT+P)
Type ESP-IDF: New Project and select it
In the dropdown menu, select ESP-IDF v5.5.3
In the New Project tab, expand the ESP-IDF Examples menu
Expand get-started and choose hello_world
Click Create project using template hello_world
In the project details, choose the Espressif SoC you will be using (you can change it later if required)
In the next screen, click Open project to open a new VS Code window with the newly created project
You should now see the files for the hello_world example project in the right panel
To build and flash the project to your Espressif module, you must tell the compiler which SoC you’re targeting.
In the previous step, we already chose the target, so no further steps are required.
However, if you need to change the target, you can:
F1 or CTRL+SHIFT+P) and typeESP-IDF: Set Espressif Device TargetESP32-S3 chip (via builtin USB-JTAG)Now, let’s build the project.
F1 or CTRL+SHIFT+P)ESP-IDF: Build Your Project

If you see the summary screen, both the toolchain and extension were installed correctly.
If you have an Espressif development board, proceed to the next section to verify USB connectivity.
Once the project is built, it’s time to flash the module.
The ESP-IDF extension for VS Code provides the command:
> ESP-IDF: Flash (UART) Your Project
However, the most commonly used command is:
> ESP-IDF: Build, Flash and Start a Monitor on Your Device
This command not only builds and flashes the project to the device but also starts a serial monitor directly in the editor terminal.
To flash the module:
> ESP-IDF: Build, Flash and Start a Monitor on Your DeviceOn Linux, you may need to add your user to the dialout group to access serial ports without administrator privileges:
sudo usermod -a -G dialout $USER
Remember to log out and log back in for the changes to take effect.
Modern Espressif development board, usually have two USB ports, called UART and USB (see picture below)
UART port is connected to the UART pins of the Espressif SoC via a USB→UART bridge chip.USB port is connected directly to D+ and D- pins of the Espressif SoC.To program the module, connect your computer to the UART port.
File → Open Folder or File → Open Recent> ESP-IDF: Select Port to Use (COM, tty, usbserial)

If your operating system doesn’t automatically detect the connected board, refer to the appropriate guide:
> ESP-IDF: Build, Flash and Start a Monitor on Your Device
UART

If you see the message in the terminal, your setup is working correctly and you’re ready for the workshop and to start developing projects based on ESP-IDF.
In this guide, we covered how to install VS Code, the ESP-IDF extension, and the ESP-IDF toolchain. We also went through how to create, build, and flash a project to your development board. Your development environment is now ready to use.