
Part 3: Build, Flash, and Test
·2 mins
Build the project with ESP-IDF, flash it to an ESP32-C3 DevKit, provision it through the ESP RainMaker Home app, and verify every control, from app sliders to physical button presses.
Welcome to the ESP RainMaker Studio workshop. In this hands-on guide, you will go from a blank project to a cloud-connected Rainbow LED on an ESP32-C3 DevKit. With the RainMaker framework already wired up, you can focus on your product instead of the boilerplate.
If you are new to ESP RainMaker, we recommend reviewing the Introduction to ESP RainMaker before starting this workshop.
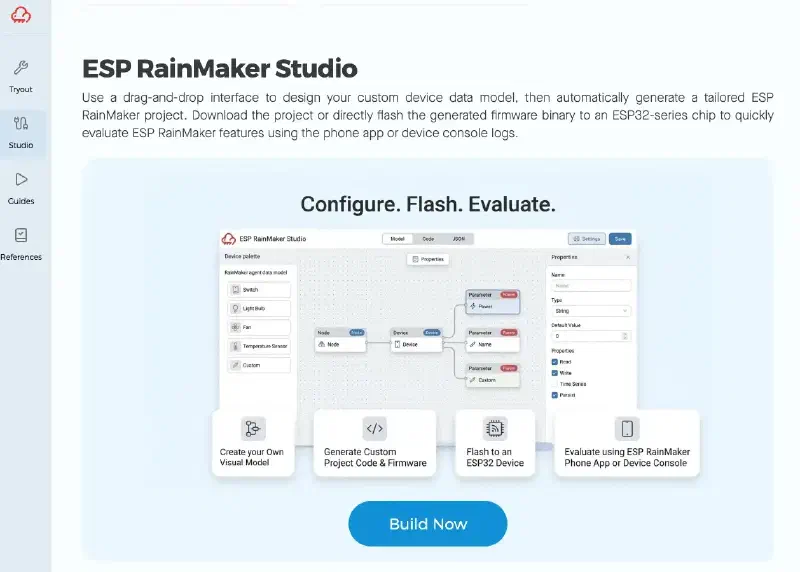
ESP RainMaker Studio is a browser-based drag-and-drop tool on the ESP RainMaker Evaluation Hub. It lets you visually design an ESP RainMaker device data model, which is the node, devices, parameters, and services that define what your IoT product exposes to the cloud and phone app. From that model, ESP RainMaker Studio automatically generates a complete, buildable ESP-IDF project.
Before your product starts taking shape, you usually need to decide how to structure the node and devices, map product controls into RainMaker parameters, wire services such as provisioning and OTA, and grow a bit more comfortable with the framework. That takes time and effort, often starting with reading the documentation and experimenting before anything comes together.
With ESP RainMaker Studio, you don’t have to start from zero. Skip the early setup that slows down a project kickoff and design from the product experience first, focusing on three areas:
No account is required; projects are saved in your browser. The generated ESP-IDF project ships with RainMaker framework setup, provisioning, OTA, scheduling, and services already wired up. Define your product’s cloud and app behavior, then implement the hardware drivers behind those controls.
| Benefit | Details |
|---|---|
| Complete ESP RainMaker Framework Setup | app_main.c is fully generated, with RainMaker init, NVS, network, OTA, timezone, scheduling, scenes, and Insights all wired up |
| Visual data model | Design your device hierarchy graphically; see it reflected instantly in the JSON and Code tabs |
| Instant feedback | Get instant feedback on missing fields such as model and type, so your codebase is correct and accurate before you download the complete ESP-IDF project |
| Chip-targeted output | Select your target (ESP32-C3, ESP32-S3, etc.) and the project ships with the matching sdkconfig.defaults |
| Prototype to product | The same data model you define here can map directly to your production RainMaker configuration, with no rework |
| Faster time-to-market | Skip days of reading RainMaker API docs for standard device types; focus engineering time on your hardware differentiation |
| Standard param types | Power, Brightness, Color Hue, Fan Speed, and more are pre-configured with the correct ESP RainMaker type strings, UI hints, and default values |
| Custom params supported | Add any custom parameter type with a slider, toggle, or input UI, for full flexibility with novel devices |
| Requirement | Details |
|---|---|
| Browser | Chrome or Edge (Chromium-based). Firefox and Safari are not supported for flashing via Web Serial |
| ESP-IDF | v5.0 or later. Install via the ESP-IDF Getting Started Guide |
| Hardware | ESP32-C3-DevKitC. The onboard WS2812 RGB LED is on GPIO 8, BOOT button on GPIO 9 |
| ESP RainMaker Home app | Install the ESP RainMaker Home app for Android or iOS (Required to provision Wi-Fi and control the device) |
This workshop is divided into three parts:
The next step is Part 1: Build Your Data Model in Studio